Welcome to my Blog

Hi, my name is Suanne and I am writing this blog to share some of the tips and recipes I have learned or created with our backyard garden. The garden itself is actually my husband John's but we have had a garden for over 25 years so I have picked up some garden knowledge along the way. We live in Austin, Texas so we are blessed with a year long growing season. We always have something to eat from the garden and this pretty much dictates what we eat. All of our meals are planned around what happens to be growing at the time. One of the biggest challenges is what I like to call crop maintenance. What to do with all of the vegetables? Beyond sharing with the neighbors and friends I am always trying creative approaches to preparing the bounty. So the blog seemed like a good way to both keep track of and share my recipes.

Sunday, January 31, 2010

and now a few words about Compost


We are going down to Natural Gardener today to get some compost to begin preparing some of the beds for the spring garden. Compost is an essential part of the garden as it adds organic materials that feed the microbes in the garden. The microbes turn this into waste which naturally feeds the plants. If you are purchasing compost use different kinds each season as it add a variety of organic material and keeps the garden healthier. One word of caution on compost is to wait a couple of days after adding to the soil as it can burn new plants.

To add compost remove the old plants or cut them off at the roots add 3 to four inches of compost on top of the beds. Using a pitch fork dig down about 8 inches if possible and let the soil and compost combine by have it drop through the tines of the forks.

Saturday, January 30, 2010

Parsnips and Carrots


We pulled our first parsnips today. Yummy. John planted quite a few of them and usually they take another month or so but he picked a few today. Parsnips are in the carrot family. Well actually it is probably more correct to say carrots are in the parsnips family. Carrot were developed for the House of Orange and at the time parnips were the root vegetable of choice. One tip on growing carrots and parsnips. Do not add any compost or fertilizer before planting and while they are growing. Also, make sure if you are not planting a shallow short carrot that you have at least 12 inches of nice loose soil for them to grow. Our carrots and parsnips were planted back in September but we layer about 6 inches of mulch on top of the parsnips. Neither one will germimate until the soil temperature gets below 85 degress. Peak germination for parsnips is 68 degress and for carrots it is 77 degees. You can reduce the soil temperature by layering the mulch on top. Both of these did just fine in our latest freeze where the temperature went into the teens. You don't have to even cover them. They like the hard frost as it increases the sugar content.


Carrot, Parsnip and Swiss Chard stir fry.

2 carrots chopped
2 parsnips chopped
1 small onion chopped
2 garlic cloves pressed
8 leaves of swiss chard
1-2 tablespoon Coconut oil or Olive oil.

Heat the oil in a frying pan or saute pan. Stir fry the onion until it get soft and add the chopped carrots, parsnips and garlic and cook stirring frequentlu until the vegetables are soft. Add the
swiss chard and cook until soft. Season with salt and pepper to taste.

Wednesday, January 27, 2010

Radicchio


We started growing Radicchio a few years ago. It is cross between a cabbage and lettuce green and can be added to salads, but make sure you balance with other lettuce types it as it has a bitter flavor that can be overwhelming by itself. This is what is left of our radicchio for the season as we were hit pretty hard by a temperatures in the teens. Usually the lettuce crops can survive the 20 degree temps but not so much below that temperature.

As you can see the plants form into a head almost like a cabbage. This one is being picked today for a pasta dish with tortellini, mushrooms and radicchio. I had this dish in Rome a few years back minus the mushrooms and decided to recreate it as home. This is what I came up with and it is now a family favorite.

Tortellini with Radicchio and Mushrooms


1 family package of tortellini
4 garlic cloves peeled and chopped
1 tablespoon olive oil or coconut oil
1 1/2 cups cream, milk or 1/2 and 1/2 (depending on how many calories you want)
3/4 cups of crumbled Gorgonzola
1/3 cup of grated Asiago
1/4 cup of cream cheese
1 head of chopped radicchio
1 package of mushrooms sliced
Black Truffle Oil

Boil Tortellini according to package instructions or until they float to the top of the pan of water and drain. In the meantime, heat oil and add garlic and mushrooms, saute around 5 minutes until mushrooms start to brown. Remove mushrooms from pan and set aside. Add cream, milk or 1/2 and 1/2 and heat to simmer. Add the cheeses and stir until melted and combines into a thick creamy sauce. Add radicchio and mushrooms and stir until radicchio is wilted a bout 2-3 minutes. Add the tortellini and stir to coat with the sauce. Service with grated Asiago on the side. Drizzle black truffle oil onto pasta.

Tuesday, January 26, 2010

Beets


I really like beets so I look forward to when we have them ready in the garden. This year however our fall planted crop did not fare well because we had some very cold temperatures which basically made the beets quit growing. So as an experiment I picked some and boiled them up, peeled and grated them to make a horseradish beet salad. They were a little woody so I guess they will all get yanked and we will plant a spring crop. You may be wondering about the cages. You do not have to cage beets. This is just John's way of trying to keep the cats out of his garden.


What to do with Beets? Well you can grill, roast, boil them or peel and grate them raw. You can also saute the beet tops as greens. To prepare from the garden you will need to pull the beet shaking off any soil so that you keep the soil in the garden. Cut off the tops which you can saute with oil and garlic and onion for a green side if you like.

Grilled Beets
serves 4

3 medium beets
salt, pepper
2 tablespoons olive oil
Peel beets and cut in 1/3 inch slices. Combine with salt pepper and oil in a bowl and mix.
Grill the beets over medium heat until tender just a couple of minutes per side.

Horseradish Beet Salad

serves 4

4 medium beets
1/3 cup low fat sour cream
2 tablespoons prepared horseradish (you can use less or more to taste)
1 teaspoon lemon juice
pinch of salt

Remove Beet tops and pointy root. Boil for 20 minutes. Cool and remove skins. They should easily peel off with your fingers. Grate - I usually use a food processor for this task because it can get messy and beet juice will stain. Combine the sour cream, horseradish, salt and lemon juice and add the grated beets. Stir until beets are coated with the sour cream mixture. Serve.


Beet Salad

1 or 2 large sliced or julienned peeled and cooked beets – roasted in fireplace or oven at 350 for one hour or boil and peel as above.
½ cup orange juice
¼ cup olive oil
3 tablespoons – rice wine vinegar
Salt
3 tablespoons fresh Mint chopped

Combine all ingredients except beets and whisk to make a vinaigrette then add sliced/julienned roasted beets and coat with the vinaigrette.

Planting the Garden

When you are ready to build your garden you should have a good idea on where and how big it is going to be. The first step is to mark out the area. Then using a shovel remove any grass shaking off any soil. If you are building a raised bed structure then you will need to build the structure. You can loosen the base by using a fork to loosen and aerate the soil. Then you will want to bring in a good garden mix which includes compost. Check your local garden center to see what they recommend for your area. If you are not creating a raised bed then you will need to make sure that there is about 8-12 inches of loose soil. This may require some effort and once method you can do to achieve this called double digging. You will need a board about 2 ft by 4 feet you can use to stand on while you dig that will reduce any compaction of the soil while you are digging. Walking on the soil once you have loosened it up defeats the purpose so once you have loosened and aerated the soil NEVER walk on it. Starting at one end of the garden use a fork or a shovel to lift up and loosen a row. Take the dirt and place the first row on a sheet of plastic, a bucket or other container. On the second row you will take the dirt and place it in the first row. Each row should be about 8 to 12 inches. On the third row place the loosed dirt in the second row and so on until you reach the end of the garden area. Then take the dirt from the first row and place in the last row. Repeat the whole process but the second time around you will want to stand on a board so you don’t compact the dirt you just loosened. Just move the board back for each row. Once the soil is all loose you will now want to add some compost. Take a fork and lift the compose and the dirt to sift it through the fork prongs to gently combine. Once this is complete your garden is ready for planting although it is better to wait a day or too as some composts need a day to settle in and fresh compost could burn new plants.

Now the fun begins. You need to determine what you will grow. You do need to do some research at this point to find out what grows when in your area. So a find our country agricultural extension and see what they recommend for your area. Next you need to find out if you can plant seeds or if you need to get plants. Your local garden center will once again be a good resource for this as they typically sell plants when it is the correct time to plant them. If you are just starting out we recommend getting the plants but if you have time and want to experiment with setting your own seeds then read the seed labels carefully to determine if you can plant them directly or if they need to be started and then transplanted. Many times depending on the season seed and plant s require a certain temperature so if you start your seed indoors under a grow light and get them to a point where you can transplant them once the right conditions exist outside you can get a jump on your growing season. Pay attention to day time temperature lows and highs. Do not plant your tomato sets until after the last freeze or be prepared to cover them in the event it does freeze.

Gardening Links

Additional Links for Gardening:
http://www.rain.org/global-garden/soil-types-and-testing.htm
http://home.howstuffworks.com/vegetable-garden-soil.htm
http://www.ipm.iastate.edu/ipm/hortnews/1994/4-6-1994/ph.html
http://eartheasy.com/grow_backyard_vegetable_garden.html
http://www.raisedbedgardeningtips.com/tipsbuilding.htm
http://www.greencornproject.org/gc/about
http://www.squarefootgardening.com/index.php/The-Project/what-is-square-foot-gardening.html

Monday, January 25, 2010

Cedar Tea Recipe

We get asked for this all the time so I am putting this in the blog to share it. January in Austin is high allergy time for the many people who are allergic to Cedar or actually Juniper trees that dot the landscape here. Several years ago my husband John and I started drinking a tablespoon a day of this cedar tea about the first of December. Our allergy symptoms went almost entirely away during the peak cedar season the first year. The second year even better. This is our third year taking the tea and we have had virtually zero symptoms.

The tea is just juniper berries picked right off the tree in our backyard. Boil 1/2 cup of berries in 1 cup water for a few minutes. Take off the heat and cool. Strain the liquid into a jar and keep refrigerated.

It is important to start around the first of December because if you wait until you actually have cedar symptoms then it is less effective. This may not work for everyone but it has been great for us. Much better than all of the over the counter or prescription medicines we used before

It’s all in the planning

People love coming to our house to look at the garden. Some people give home tours but we give the garden tour. There is always something ready for harvest and it is immensely satisfying to go out and pick what you need for dinner. It is a beautiful garden but it is that way because it was planned very carefully. There are three major components that are essential to a successful garden: sun, soil and water. It sounds pretty basic and simple, but if you do not have ALL three you will reduce your chance for success. There are others things that contribute to a productive healthy garden but these are the most important ones in the planning process.

Location, location, location. You absolutely need full sun to get good results. Study your yard for potential sights that have maximum full sun. You will need at a very minimum 5 hours of direct sunlight unobstructed by shadows of trees, buildings or fences. Think about how the sun pattern moves across your yard. You might want to keep a log for a year to determine how the sun travels across your yard throughout the year. An area that might get great sun during the winter months might be totally shaded during the summer months. Don’t think about where you think it will look best unless of course this spot gets full sun. If you have a nice spot under that big oak tree that does not seem to grow grass and you think it might be a perfect spot for a garden please think again. Unless you chop down that big oak tree this will also not grow vegetables. It might however be a lovely place for a garden that has plants they do not require full sun. You can always add water and you can add better soil but you cannot add more sunlight. So first and foremost find a very sunny spot for your garden. If you do not have a fence around your chosen garden area and you have wildlife such as deer or rabbits consider a fence as deer love to munch on gardens.

If your yard is full of trees and fully shaded and you don’t want to sacrifice a tree for the garden then consider looking for a community garden patch. Many communities will allow you to rent a space for a garden. Community gardening has the added advantage of networking with other gardeners so you can take advantage of their successes and avoid the failures. Even if you have the space in your yard take a field trip to a community garden to see what is growing. We have found that most gardeners are very willing to share gardening tips on what grows best, when to plant and how to handle those pesky bugs and you can benefit greatly from their experience.

Soil is the next thing to consider as you are planning your garden. In the Hill Country of Central Texas and especially in our backyard soil is pretty much non – existent. So when John planned the garden we also planned on bringing in dirt from our local natural garden store. There are many type of soil but they can generally be categorized into three types, sandy, loam and clay. The size of the particles of the soil determines what type it is. Soil has three type of particle clay, silt and sand. Clay has the smallest particles and when you take a handful it will form a hard ball. Silt has medium sized particle and sand has the largest particle. When you take a handful of sand it will flow right through your fingers but silt will create a ball that crumbles easily. Clay soil has more Clay than silt or sand. Loam is the idea mix for vegetable is a mix of 20 percent clay, 40 percent silt, and 40 percent sand and Sandy soil has a greater mix of sand. Good soil should be very light and airy but it should form a crumbly ball.

Soil types have many characteristics that affect how well they will support plant life and growth. These include moisture content, organic growth content, pH, temperature and color. Vegetable gardens need soil that will retain moisture and have a good amount of organic content. Moisture content is important because the amount of organic materials that can survive in your soil is dependent on how much water is available for them. If the soil is sandy it will not hold water. If the soil has too much water content it will not allow for the necessary space needed to keep soil loose and the organic matter to thrive. Healthy soil contains good organic material such as bugs and worms that help aerate the soil and decompose old roots and plants. These decomposing organic material provides many nutrients that promote healthy plant growth. Typically the darker color of the soil the better it will be to support vegetable growth.

Soil pH is also an important factor that will determine how well plants will growth. Although it varies by plant typically you want soil that is about the same as rainwater. You can measure the pH of both by using standard pH testing kits available at most drugstore. To test soil just add a little water and use a testing strip to check against the color chart on the kit. Usually the typical ph is between 6 and 7, which is idea for most vegetables. You can also contact your local county agricultural extension office to check on testing soil. Some garden centers will also provide this service. One interesting note is that we discovered that the pH of rain water is determined by which direction the rain came from. We have noticed that rain coming for the southwest, which is Mexico in our case, tends to be more acidic that rain that is sourced from a weather system originating from West and North west. As I mentioned before, some plants like soil to be more acidic than others so optimally if you know you will be planting a vegetable that like it more acidic you should plan accordingly. Asparagus patches like the soil a little more alkaline so if you keep a separate bed for Asparagus then it will do better with a higher alkalinity. How do change soil pH? A way raise pH is to add Wood ash making the soil more alkaline. To lower pH add some peat mulch.

Another factor that affects vegetables growth is the temperature of the soil. Plants will only set fruit during certain temperature ranges. Again, contact your local country agricultural extension and ask about what grows best in your area and when is the best time to plant. Many will provide charts that will tell you the idea condition for each type of fruit and vegetable. An example is tomatoes which will not set fruit once the night time temperature gets above 75 degrees and the day time temperature get about 95 degrees. The nighttime temperature is the most important so if the temperature goes to 96 for a few hours but the nighttime lows is still 71 you should still set fruit. Understanding these ranges is very important because if you plant your tomatoes in Late May in Texas they will not have time to develop enough to set fruit by the time the hot summer temperatures kick in. On the other end the temperature scale you can’t plant tomatoes before the last frost or the plants will die so you need to balance this. We often go ahead and plant early and just make sure to protect the plants by covering them in the event of a late frost. This will make sure that the plants have plenty of time to set fruit before they get above the high temperature range.

If you do not have a nice dark loose type of soil do not despair. You can bring in soil or add compost to increase the organic matter. Once you prepare your beds make sure you are careful not to walk on the garden as it compacts the soil and inhibits the organic decomposition.
If you live in a place that usually gets a pretty good annual rainfall then consider yourself very lucky. In central Texas we can get little to no rain for months at a time and then get 4 inches of rain in a couple of hours. This presents a challenge for home gardeners as consistent watering is key to a productive garden. When planning the location of your garden make sure you also plan on having access to water close buy to make sure your can provide extra water to your plants when rain is not in the forecast. We have a drip irrigation system that is set up on a timer to make sure our plants get consistent water. The timer is nice because if you go away for a long weekend or on vacation the garden will still get watered. Manual watering is just fine especially if you are lucky enough to get rain on a frequent basis. The garden does need to be watered every few days, more if the temperature is very hot.

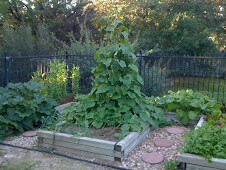
The size and design of your garden will be determined by many factors including how much space you have, how fancy you want to get, and how many vegetables you want to grow. Make sure you design your garden so that you can reach every point in it without walking on the soil which will compact it and prohibits organic decomposition.. Our preferred method is a raised bed garden but it is also possible to just create the beds without a raised structure. Raised beds provides many advantages including higher yields, less weeding and a longer growing season as raised beds soil warms up quicker than gardens dug below the natural grade. One drawback is that in warm climates like Texas or Arizona the soil temperature peak sooner so you have to balance the advantages of getting your seed in early to how long they produce in the hot summer. The ideal width for a section is about 4-5 feet - this allows you to reach 2 to 2 and a half feet from both sides. You can make the length as long as your area permits. So if you want a rectangular garden then make it 4 feet by 8 feet or 4 feet by 12 feet. See Example A. Another suggestion is to make several bays as shown in example B. Again you can make as many areas as you like. The size of your garden is really dictated by the amount of land you have available that is sunny and is also close to a water source.


For more space extend the bays on both ends as seen in example 3.


If you want to start small or you have limited space you might want to try Square foot gardening. This method developed by Mel Bartholomew ( http://www.squarefootgardening.com/index.php/The-Project/what-is-square-foot-gardening.html) allows you to garden in a very small space with high yields. With square foot garden you clear a space that is 4 feet by 4 feet. You can make this raised bed or just make sure you prepare the beds so that you have at least 8 inches to a foot of loose soil by adding a good garden mixture which includes compost, peat and vermiculite. You then use string to create a Grid over the area as in the following illustration. When the plants die or quit producing you can either snap them off at the roots or pull them, add more compost and then plant a new plant.


Raised bed structures can be just about anything but avoid treated lumber and railroad ties as they will leak harmful chemicals into your soil. There are a few companies that sell kits for raised bed gardens and most of these are made of safe recycled plastic material that will not decompose as lumber will. There are also some may out of cedar. They tend to be a bit pricey so depending on your budget you may want to build your own. If you have brick or stone you can also use this to make your structure. If you do use lumber make sure you reinforce the corners. One suggestion is to use brackets or alternate the ends and then drill a hole and insert rebar to connect all pieces together.

Another option is to just start digging and not create a raised bed. This is also fine unless you really do not have an abundant of soil. The raised bed allows you to create more depth for your garden. If your soil is not idea for growing anything but rocks we really recommend the raised bed approach as you can just add a good garden mixture right on top. Also if your garden is very large it may not be practical to use raised beds but just make sure you build up the garden in between rows and that you only walk in the paths between rows.

You will need at a minimum a long shovel, pitch fork and gloves. The shovel is used to double dig, the fork is used to aerate and lift the soil. If you have a lots of rocks in the soil you may need to break them up to remove them. You will want to remove weeds and grass as you prepare the beds so weeding tools also come in handy. Double digging is a technique used to prepare garden beds for planting. It is a method of loosening and aerating the soil that allows roots to grow deeper and access water more easily. The first time is always the hardest and if you keep from walking on the soil the second time you plant the soil will be much easier to prepare for planting.

Introduction

When we first started growing tomatoes it wasn’t because it was part of any local trend or because it was the “green” thing to do. We did it because home grown tomatoes just plain taste better. If they are fresh picked they do not have time to begin the deterioration process. They are not picked green to ripen during the transportation process with often mushy results. I confess to being a tomato snob and that I almost never eat restaurant tomatoes or buy them from a store when they are not in season because I am always disappointed. I have just learned to eat tomatoes when it is tomato season and others things when it is not. Another benefit of growing our own vegetables is that we were able to eat tomatoes when there was the tomato contamination and we were able to eat spinach when we had the spinach e-coli contamination.

We have learned through trial and error what grows when, what varietals work best for our weather conditions. When we first started growing vegetable in the eighties we used pesticides to control pests and disease but now we have learned that you don’t need to put harmful chemicals on your plants to keep them healthy and productive. You can use companion plants, and natural extracts and soaps to control most pest problems. We absolutely eat seasonally and growing food in your backyard is as local as you can get. I will also tell you that because we have our backyard garden we eat healthier as our meals are planned around what is available from the garden and we eat very fresh vegetable that are picked as we need them. We have also learned to be creative in the kitchen as we try new ways to cook our produce. It has definitely been a learning process but its been fun learning about new vegetables and finding creative ways to prepare them. We had Swiss Chard planted in our garden for over a year before I figured out how to cook it properly. My husband had planted it and I had never seen it before or even heard of it. I assumed that it was like a lettuce and while you can eat it raw like a lettuce it is even more delicious steamed or sautéed like a green. Our family, neighbors, and friends also benefit from the garden as they are often the recipients of any excess we happen to have.

This blog is more of a guide rather than a how to. There are many ways to garden and it is something you have to evolve and experiment with. We volunteer with the Austin Green Corn Project which is a grassroots, volunteer-run organization dedicated to helping Central Texans in need grow their own organic vegetables. Green Corn Project installs organic food gardens for elderly, low-income, and disabled community members as well as for elementary schools, community centers, and shelters in underserved areas of Austin. One of the volunteer leaders has a joke he uses with every new group of volunteers. “If there is one thing two gardeners can agree upon it is that the third gardener is doing it wrong.” There are many gardening techniques and theories - our best advice is to start small and try new things as you learn what works and what doesn’t for your environment and lifestyle.

Sunday, January 24, 2010

Rutabagas

Tonight we are having rutabaga with an apple stuffed pork loin and Arugula salad on the side. I am going to try something new with the rutabaga. I am going to peel and cube it and boil until nearly tender, then I am going to saute it in olive oil and herbs. I will let you know how it turns out.

Ok the rutabaga actually turned out great. Probably one of my favorites for rutabaga so far so here is the recipe.


Sauteed Rutabaga

1 large rutabaga, peeled and cubes into about 1/2 square pieces
salt, pepper, ground nutmeg
3 tblspoons of butter

Boil the rutabaga in water until tender about 20 minutes. Drain. Heat the butter in a
saute pan and add the cooks rutabaga cubes. Saute about 5 minutes until they start to brown and carmelize. Using a spatula gently turn and continue sauteing until brown on all side. Season with ground nutmeg, salt and pepper.

Here is the rutabaga that we picked for dinner. The added benefit of growing your own besides the obvious freshness is that there is none of that pesky wax on the outside so you can compost all of the peelings. This Rutabaga was about 5 inches long with a 3-4" circumference. It served 4 easily.


More Rutabaga Recipes:

Rutabaga Gnocchi


1 large rutabaga roasted and peeled and mashed (you can also boil it)
1 cup ricotta
½ cup grated asiago
Salt, grated nutmeg and a pinch of ground allspice
1 egg
Flour to make a soft dough - about 2 cups
Mix first 4 ingredients, make a well and add egg. Add flours ½ cup at a time until a soft dough forms.
Divide into 4 sections and roll out each section into long coil. Cut small pieces on a diagonal about ½ to 1 inch long.
Freeze pieces.
To cook bring large pot of water to boil, drop frozen gnocchi in and cook a couple of minutes until they float to the top. Drain and add sauce

Sauce:
3 tablespoons butter melted
½ cube knorr chicken bouillon
3 tablespoons flour
Chopped herbs such as chervil
about 1 cup Chicken Stock
1/2 cup cream or half and half
Make roux with butter and flour
Add chicken broth until slightly thick and add cream until sauce consistency.
Season with salt and pepper, and ground nutmeg

Pasty's - meat pies with Rutabaga, carrot and potato


Pastry
3 cups flour
3/4 cup butter
1 1/2 tsp salt
6 tbspoon ice cold water

In food processor with dough blade add flour, salt and butter cut into small pieces. Process until large crumbles form. Slowly add the ice cold water while processing until the dough starts forming into a ball. Remove and sahpe into a disk - wrap with plastic wrap and chill for at least 30 minutes.

Filling
1 lbs of beef (chuck, tenderloin, tips) raw. I usually buy a whole tenderloin and cut off and save the skinny end for this purposes since they don't make nice steaks.
1 onion chopped
1 1/2 cups grated carrots
1 1/2 cups grated potatoes
1 1/2 cups grated rutabaga
salt, pepper, grated nutmeg for seasoning

6 teaspoons butter

Process the beef until a ground consistency ( you can use ground sirloin), add with all the other ingredients except butter into a large bowl and mix. Divide the dough into 6 pieces and roll each into 10 inch rounds on a lightly floured surface. Put 1 1/2 cups filling on each round. Fold over and crimp the edge to look like a large turnover. Transfer to a lightly greased baking sheet and cut 3 slits in each pasty. Insert 1/3 tsp in each slit. Bake at 350 for 1 hour.