Welcome to my Blog

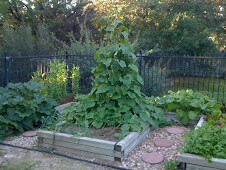
Hi, my name is Suanne and I am writing this blog to share some of the tips and recipes I have learned or created with our backyard garden. The garden itself is actually my husband John's but we have had a garden for over 25 years so I have picked up some garden knowledge along the way. We live in Austin, Texas so we are blessed with a year long growing season. We always have something to eat from the garden and this pretty much dictates what we eat. All of our meals are planned around what happens to be growing at the time. One of the biggest challenges is what I like to call crop maintenance. What to do with all of the vegetables? Beyond sharing with the neighbors and friends I am always trying creative approaches to preparing the bounty. So the blog seemed like a good way to both keep track of and share my recipes.

Sunday, January 31, 2010

and now a few words about Compost


We are going down to Natural Gardener today to get some compost to begin preparing some of the beds for the spring garden. Compost is an essential part of the garden as it adds organic materials that feed the microbes in the garden. The microbes turn this into waste which naturally feeds the plants. If you are purchasing compost use different kinds each season as it add a variety of organic material and keeps the garden healthier. One word of caution on compost is to wait a couple of days after adding to the soil as it can burn new plants.

To add compost remove the old plants or cut them off at the roots add 3 to four inches of compost on top of the beds. Using a pitch fork dig down about 8 inches if possible and let the soil and compost combine by have it drop through the tines of the forks.

Saturday, January 30, 2010

Parsnips and Carrots


We pulled our first parsnips today. Yummy. John planted quite a few of them and usually they take another month or so but he picked a few today. Parsnips are in the carrot family. Well actually it is probably more correct to say carrots are in the parsnips family. Carrot were developed for the House of Orange and at the time parnips were the root vegetable of choice. One tip on growing carrots and parsnips. Do not add any compost or fertilizer before planting and while they are growing. Also, make sure if you are not planting a shallow short carrot that you have at least 12 inches of nice loose soil for them to grow. Our carrots and parsnips were planted back in September but we layer about 6 inches of mulch on top of the parsnips. Neither one will germimate until the soil temperature gets below 85 degress. Peak germination for parsnips is 68 degress and for carrots it is 77 degees. You can reduce the soil temperature by layering the mulch on top. Both of these did just fine in our latest freeze where the temperature went into the teens. You don't have to even cover them. They like the hard frost as it increases the sugar content.


Carrot, Parsnip and Swiss Chard stir fry.

2 carrots chopped
2 parsnips chopped
1 small onion chopped
2 garlic cloves pressed
8 leaves of swiss chard
1-2 tablespoon Coconut oil or Olive oil.

Heat the oil in a frying pan or saute pan. Stir fry the onion until it get soft and add the chopped carrots, parsnips and garlic and cook stirring frequentlu until the vegetables are soft. Add the
swiss chard and cook until soft. Season with salt and pepper to taste.

Wednesday, January 27, 2010

Radicchio


We started growing Radicchio a few years ago. It is cross between a cabbage and lettuce green and can be added to salads, but make sure you balance with other lettuce types it as it has a bitter flavor that can be overwhelming by itself. This is what is left of our radicchio for the season as we were hit pretty hard by a temperatures in the teens. Usually the lettuce crops can survive the 20 degree temps but not so much below that temperature.

As you can see the plants form into a head almost like a cabbage. This one is being picked today for a pasta dish with tortellini, mushrooms and radicchio. I had this dish in Rome a few years back minus the mushrooms and decided to recreate it as home. This is what I came up with and it is now a family favorite.

Tortellini with Radicchio and Mushrooms


1 family package of tortellini
4 garlic cloves peeled and chopped
1 tablespoon olive oil or coconut oil
1 1/2 cups cream, milk or 1/2 and 1/2 (depending on how many calories you want)
3/4 cups of crumbled Gorgonzola
1/3 cup of grated Asiago
1/4 cup of cream cheese
1 head of chopped radicchio
1 package of mushrooms sliced
Black Truffle Oil

Boil Tortellini according to package instructions or until they float to the top of the pan of water and drain. In the meantime, heat oil and add garlic and mushrooms, saute around 5 minutes until mushrooms start to brown. Remove mushrooms from pan and set aside. Add cream, milk or 1/2 and 1/2 and heat to simmer. Add the cheeses and stir until melted and combines into a thick creamy sauce. Add radicchio and mushrooms and stir until radicchio is wilted a bout 2-3 minutes. Add the tortellini and stir to coat with the sauce. Service with grated Asiago on the side. Drizzle black truffle oil onto pasta.

Tuesday, January 26, 2010

Beets


I really like beets so I look forward to when we have them ready in the garden. This year however our fall planted crop did not fare well because we had some very cold temperatures which basically made the beets quit growing. So as an experiment I picked some and boiled them up, peeled and grated them to make a horseradish beet salad. They were a little woody so I guess they will all get yanked and we will plant a spring crop. You may be wondering about the cages. You do not have to cage beets. This is just John's way of trying to keep the cats out of his garden.


What to do with Beets? Well you can grill, roast, boil them or peel and grate them raw. You can also saute the beet tops as greens. To prepare from the garden you will need to pull the beet shaking off any soil so that you keep the soil in the garden. Cut off the tops which you can saute with oil and garlic and onion for a green side if you like.

Grilled Beets
serves 4

3 medium beets
salt, pepper
2 tablespoons olive oil
Peel beets and cut in 1/3 inch slices. Combine with salt pepper and oil in a bowl and mix.
Grill the beets over medium heat until tender just a couple of minutes per side.

Horseradish Beet Salad

serves 4

4 medium beets
1/3 cup low fat sour cream
2 tablespoons prepared horseradish (you can use less or more to taste)
1 teaspoon lemon juice
pinch of salt

Remove Beet tops and pointy root. Boil for 20 minutes. Cool and remove skins. They should easily peel off with your fingers. Grate - I usually use a food processor for this task because it can get messy and beet juice will stain. Combine the sour cream, horseradish, salt and lemon juice and add the grated beets. Stir until beets are coated with the sour cream mixture. Serve.


Beet Salad

1 or 2 large sliced or julienned peeled and cooked beets – roasted in fireplace or oven at 350 for one hour or boil and peel as above.
½ cup orange juice
¼ cup olive oil
3 tablespoons – rice wine vinegar
Salt
3 tablespoons fresh Mint chopped

Combine all ingredients except beets and whisk to make a vinaigrette then add sliced/julienned roasted beets and coat with the vinaigrette.

Planting the Garden

When you are ready to build your garden you should have a good idea on where and how big it is going to be. The first step is to mark out the area. Then using a shovel remove any grass shaking off any soil. If you are building a raised bed structure then you will need to build the structure. You can loosen the base by using a fork to loosen and aerate the soil. Then you will want to bring in a good garden mix which includes compost. Check your local garden center to see what they recommend for your area. If you are not creating a raised bed then you will need to make sure that there is about 8-12 inches of loose soil. This may require some effort and once method you can do to achieve this called double digging. You will need a board about 2 ft by 4 feet you can use to stand on while you dig that will reduce any compaction of the soil while you are digging. Walking on the soil once you have loosened it up defeats the purpose so once you have loosened and aerated the soil NEVER walk on it. Starting at one end of the garden use a fork or a shovel to lift up and loosen a row. Take the dirt and place the first row on a sheet of plastic, a bucket or other container. On the second row you will take the dirt and place it in the first row. Each row should be about 8 to 12 inches. On the third row place the loosed dirt in the second row and so on until you reach the end of the garden area. Then take the dirt from the first row and place in the last row. Repeat the whole process but the second time around you will want to stand on a board so you don’t compact the dirt you just loosened. Just move the board back for each row. Once the soil is all loose you will now want to add some compost. Take a fork and lift the compose and the dirt to sift it through the fork prongs to gently combine. Once this is complete your garden is ready for planting although it is better to wait a day or too as some composts need a day to settle in and fresh compost could burn new plants.

Now the fun begins. You need to determine what you will grow. You do need to do some research at this point to find out what grows when in your area. So a find our country agricultural extension and see what they recommend for your area. Next you need to find out if you can plant seeds or if you need to get plants. Your local garden center will once again be a good resource for this as they typically sell plants when it is the correct time to plant them. If you are just starting out we recommend getting the plants but if you have time and want to experiment with setting your own seeds then read the seed labels carefully to determine if you can plant them directly or if they need to be started and then transplanted. Many times depending on the season seed and plant s require a certain temperature so if you start your seed indoors under a grow light and get them to a point where you can transplant them once the right conditions exist outside you can get a jump on your growing season. Pay attention to day time temperature lows and highs. Do not plant your tomato sets until after the last freeze or be prepared to cover them in the event it does freeze.

Gardening Links

Additional Links for Gardening:
http://www.rain.org/global-garden/soil-types-and-testing.htm
http://home.howstuffworks.com/vegetable-garden-soil.htm
http://www.ipm.iastate.edu/ipm/hortnews/1994/4-6-1994/ph.html
http://eartheasy.com/grow_backyard_vegetable_garden.html
http://www.raisedbedgardeningtips.com/tipsbuilding.htm
http://www.greencornproject.org/gc/about
http://www.squarefootgardening.com/index.php/The-Project/what-is-square-foot-gardening.html

Monday, January 25, 2010

Cedar Tea Recipe

We get asked for this all the time so I am putting this in the blog to share it. January in Austin is high allergy time for the many people who are allergic to Cedar or actually Juniper trees that dot the landscape here. Several years ago my husband John and I started drinking a tablespoon a day of this cedar tea about the first of December. Our allergy symptoms went almost entirely away during the peak cedar season the first year. The second year even better. This is our third year taking the tea and we have had virtually zero symptoms.

The tea is just juniper berries picked right off the tree in our backyard. Boil 1/2 cup of berries in 1 cup water for a few minutes. Take off the heat and cool. Strain the liquid into a jar and keep refrigerated.

It is important to start around the first of December because if you wait until you actually have cedar symptoms then it is less effective. This may not work for everyone but it has been great for us. Much better than all of the over the counter or prescription medicines we used before